
- Step 1: Preparing the case
- Step 2: Installing the CPU
- Step 3: Installing RAM
- Step 4: Installing the Motherboard
- Step 5: Making Motherboard Connections
- Step 6: Installing an SATA two drive array
- Step 7: Installing Adapters, Nvidia GeForce PCI Express
- Step 8: Finishing the hard drive array
- Step 9: Installing the DVD recorder
- Step 10: Closing up and CMOS Setup
Copyright 2018 by Morris Rosenthal
All Rights Reserve
Build Your Own PC - Step 8: Finishing the hard drive array
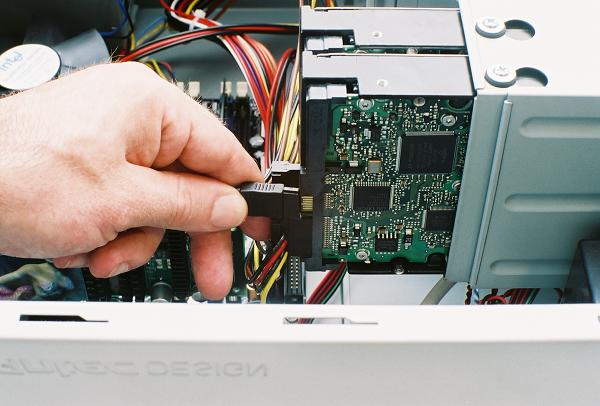
Now that the video adapter has been installed, we can continue with the final connections on our drive array. The SATA data cable is a smaller format connector than the SATA power cable, and each drive requires its own cable for the point-to-point connection. The cable connector is keyed so it can only be mated in the correct orientation.
Figure 54: Connecting an SATA data cable to the hard drive
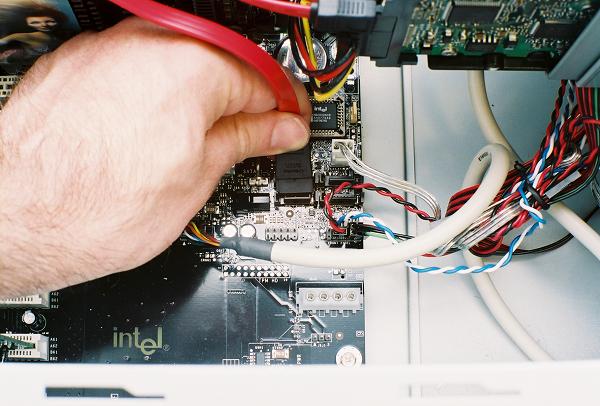
There are four Serial ATA connection points on our motherboard, which also support RAID 0 and RAID 1 configurations. RAID 0 supports drive striping, which increases the overall array performance by working the drives in parallel, and RAID 1 mirrors the drives, making an exact copy for data redundancy. Both applications require a pair of identical drives. The motherboard SATA connection is also keyed for proper mating.
Figure 55: Connecting the SATA cable to the motherboard
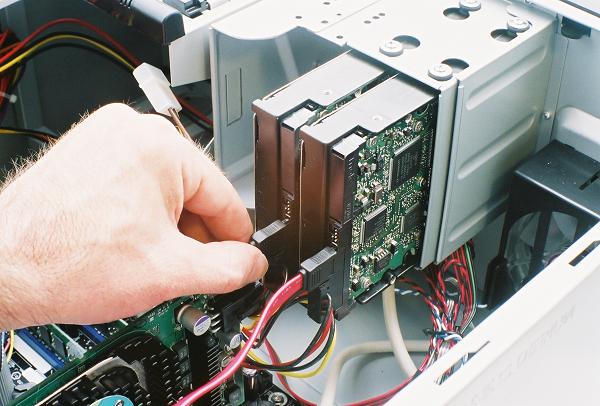
Our second drive in the array is connected the same as the first, though we had to be careful not to stress the edge connector on the drive due to physical interference from the video adapter. The edge connector can be damaged by excessive force, so you need to be a little careful working around any SATA connectors. The other end of the cable is attached to another SATA connector on the motherboard.
Figure 56: Connecting the second SATA data cable
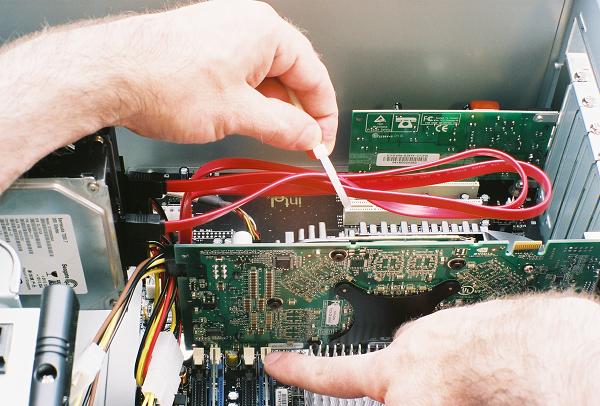
You can see from the following picture that cable manufacturers tend to err on the side of making SATA cables too long. Keeping in mind the somewhat fragile edge connectors, we cable-tied the slack to keep it from creating a pulling hazard. The finger at the bottom of the picture is point to a white latch on a DIMM socket. The long video adapter obstructs the latches so that no memory can be installed or removed with the video adapter in place.
Figure 57: Bundling the SATA data cables
Proceed to Step 9: Installing the DVD recorder