
- Step 1: Preparing the case
- Step 2: Installing the CPU
- Step 3: Installing RAM
- Step 4: Installing the Motherboard
- Step 5: Making Motherboard Connections
- Step 6: Installing an SATA two drive array
- Step 7: Installing Adapters, Nvidia GeForce PCI Express
- Step 8: Finishing the hard drive array
- Step 9: Installing the DVD recorder
- Step 10: Closing up and CMOS Setup
Copyright 2018 by Morris Rosenthal
All Rights Reserve
Build Your Own PC - Step 9: Installing the DVD recorder
Since all 5.25" drive are installed from the front of the case, it's necessary to remove the plastic blank for whichever bays are being used. This blank is actually held in place by a little plastic latch on the right-hand side. Cheaper cases usually require you to pop out the blanks from the inside.
Figure 58: Removing the plastic 5.25" bay blank

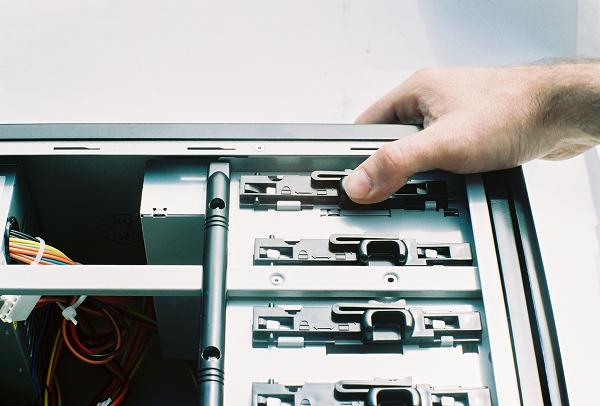
Our Antec case features a screwless rail system for mounting the 5.25" drives. The two wire stubs protruding from the black plastic rail are actually opposite ends of a long stiff wire that acts as a spring.
Figure 59: Wire ends of the screwless rail

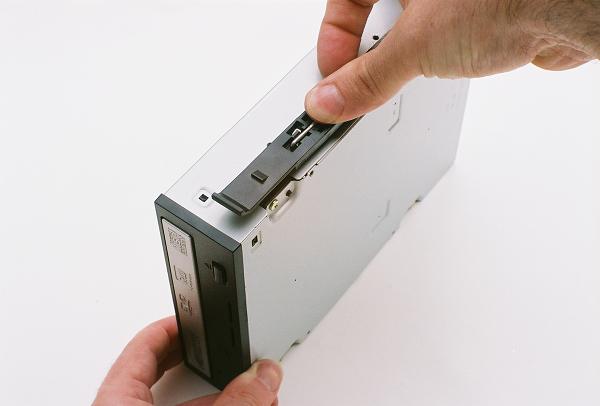
By holding the drive up to the open bay, we determine that the rail needs to be attached to the bottom set of holes in the side of the drive. Hook one end of the wire into one of the holes, then push done on the center of the exposed length of wire which acts as a spring. The other end of the wire should click into place and lock the rail firmly to the drive unless you pry it off.
Figure 60: Snapping the screwless rail into place
Before installing the DVD recorder in the case, we attach the CD Audio connector. It's easier to make this attachment at this point because once installed, it will be against the side of the case with plenty of power supply cables in the way. The white jumper to the right of the audio connector is the Master/Slave jumper, which is set to "Master."
Figure 61: Connecting the CD Audio lead to the DVD recorder
The drive is then slid into position from the front of the case. If you're building a system with multiple DVD or CD drives sharing a cable, you'll have to chose one drive to be "Master" and one drive to be "Slave" and set the corresponding jumper on the back of the drive. It's very rare these days to share an IDE ribbon cable between an optical drive and a parallel IDE hard drive because the degradation in hard drive performance.
Figure 62: Installing the Memorex DVD recorder

The drive is held in place by sliding the plastic lock on the side of the bay towards the back of the case. If you forget this step, you'll notice the drive moving when you go to install the power connector.
Figure 63: Locking the DVD recorder into place
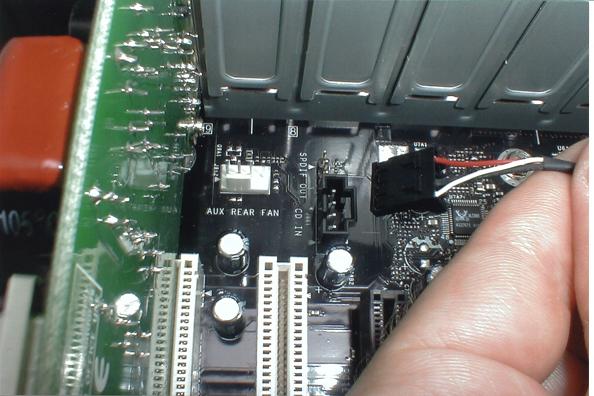
Next we attach the other end of the CD audio cable to the proper connection point on the motherboard. It's a good idea to check the manual if the motherboard doesn't have a clearly labeled "CD in" or "CD Audio" port. The lock on the connector serves as a key to prevent it from being inserted backwards. In some builds you'll have to connect the CD audio cable before you install all of the adapters because they will block access to the port.
Figure 64: Connecting the CD audio to the motherboard
Next we connect the 40 wire parallel IDE cable to the DVD recorder. There's no advantage to using 80 wire IDE cables with DVD and CD drives, the old 40 wire cables provide more than enough bandwidth for their relatively slow transfer speeds. The cable header is keyed to it only fits into the drive with the colored key wire on pin 1.
Figure 65: Connecting the IDE cable to the DVD recorder

There's only a single IDE controller on this motherboard, with four SATA ports, they don't expect anybody to install older technology hard drives. The IDE controller is located on the edge of the motherboard, next to the floppy controller which we didn't use in this build. The cable is keyed to fit one way, but it doesn't hurt to confirm that the colored key wire is to the pin 1 end of the connector, sometimes marked with an arrow or a spot.
Figure 66: Connecting the IDE cable to the controller

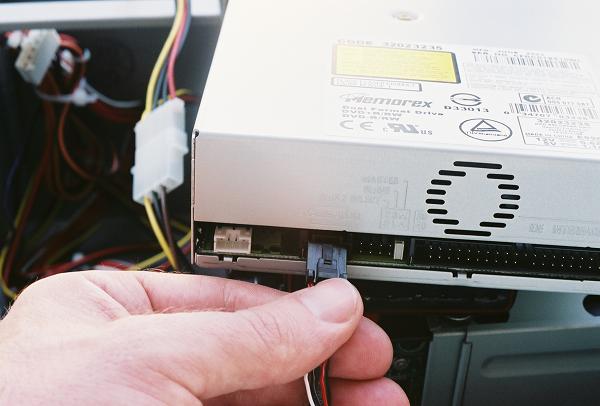
The final step to connecting up our DVD recorder is to connect the power. The 1x4 connector from the power supply is rounded on two corners so it can only be inserted the right way, but it takes a bit of pushing. You don't have to get it seated all the way to the ridge stop, just far enough so it doesn't pull out easily.
Figure 67: Connecting power to the DVD recorder

Proceed to Step 10: Closing up and CMOS Setup